Hi and it's Luke,so I was thinking about Membership and Crowns.
Membership has so many benefits, but I mean £6.19 monthly? I could buy myself 3 games for that!
Crowns cost WAY too much, I mean, 5,000 crowns for like £10.00? I think that may be a bit TOO much!
I've bought myself a membership though and due to some kind of activity I did , I got a FREE pack of 2,000 crowns! :-) yay!
I hope KingsIsle will make them cheaper as when I'm older I'll make a game costing 100 sapphires (that's crowns in my game) for 1p!
---------------------------------------
Hope you have a pleasant time
Hey! Itza Luke and here are some spells and a poem I made!
To view it please go to theurges-tower.blogspot.com and select SASAARB from the archive.
To view the poem look below!
Sophia Emeraldblossom had the remnant,
of a very powerful pendant,
of the mighty maker she was a descendant,
a wizard she was transcendent.
She picked up the wand,
and with it had to magically bond,
her swift hair was blonde,
when she was trying out the wand,
down by the shallow pond.
cya
Hi it's LUKE! So, say! Our specialist technicians have managed to conjure up a great forum hosted by us, Theurges Tower! Wanna check it out? It's address is http://theurgestowerforum.webs.com !
Join us now and help over 35 million players !
I hope you enjoy it but you must be a TT forum member! Make a FREE account on webs.com and gain access to EVERYTHING including posting on forums etc.
So to survive in PvP I suggest to use those cards.Remember when you have at least 3 pips and are near defeat USE a HEALING card or use this 9 pip combo, first gain 9 pips for efreet, and their next attack will be epic fail doing -90% damage, so on that round use a simple Pixie or fairy spell.
If you are in the middle of a battle but have kinda about HALF of your health and 5 or more pips quickly cast the GUARDIAN SPIRIT spell. Once you are defeated the GUARDIAN SPIRIT will heal you however many pips you had but in hundreds (5 pip = 500h)
To make your heals over +90% effective,simply cast a SANCTUARY and GUIDING LIGHT on yourself!
cya
Hyia It's heezz bro (*-*) so the info is this -
Due to Luke's impresence for a big amount of time,this blog will now be called Pyromancer's Place as well as TT coz im Pyromancer! The entries will still have TT on it but will be focused on fire as well as life!
THE QUIZ
What is a rank 3 with these letters D_____ _O___ ?
Paulson is to (rattlebones,lost soul,norton) as Grubb is to (lady blackhope,malistaire,lost soul)
The _ pip fire spell is called H_L______!
Wyvern does ____ max damage!
Vampire steals 355 health and converts 1/2 into health. T/F?
Helephant vs Wyvern = winner = ________
Scroll down for answers
Desert Golem
Norton (sub-boss) and Lady Blackhope (boss)
6, Helephant
395
False it steals 350
Definately HELEPHANT it does about 695 max damage and wyvern does only 395 max!
cya
Since the introduction of crafting throughout the worlds of the Spiral, there has been a cacophony of complaints from a lot of young wizards. So the Spiral Free Press has undertaken an investigation to see what issues are causing the uproar.
The most frequent cause for this appears to be related to the availability of reagents. We asked Master of Fire, Ian Sunflame his experiences when searching for materials to complete the crafting quests, unfortunately, at just them mention of this topic, he spontaneously combusted, leaving us a bit charred and starring at a pile of ashes. We can only take this to mean that the wizards that have reached a higher degree of education are finding it infuriating to meander the mountains and meadows of the Spiral in search of these elusive items.
After the reaction of Mr. Sunflame, we were hesitant to approach any other students, as we prefer to help protect these young wizards rather than cause them harm. However, after a bit of deliberation, we tossed those concerns directly into the void that exists between worlds and approached our next subject, Magus Necromancer, Ian Ghostrider. When asked about the difficulty in finding supplies to support his crafting quests, Mr. Ghostrider said "Heck, seems to me that I find everything I need at just about the right time thus far.". We asked him how long he had been training under the excellent teachers of Ravenwood and found out that he is a recent addition to the inhabitants of the Spiral. In fact, when asked about what he though about the new world that had been recently re-discovered, Grizzleheim, he said "I didn't know that was a new thing. That bear has been standin' down by that boat ever since I arrived. I kind of hope he offers to take me fishing in it someday!".
So, with the vast difference in responses we received from these two fine students, we can only conclude that for new arrivals, the rate of reagents spawn and the amounts you currently get them are pretty well balanced when working the quests along with their education at Ravenwood. But that for those that have already been well educated, this does in fact seem to be posing a bit of an issue. It seems the time to locate all of the necessary ingredients for a recipe in these quests will roughly equivocate to the amount of time it takes to complete each world individually. That is rough news for our star scholars.
There have recently been some grumblings in the Wizard101 Central community about maybe adding a way to recover some portion of the reagents from an item by reversing the crafting process. It seems to me that this may well be a new skill that Headmaster Ambrose and the other staff of Ravenwood should consider teaching. After all, we don't want the students to start burning out from to much homework.
Hey there it's Luke's bro freddy! Luke's goin to senior school so I'll do the blog for him quite a bit of the time! So which SOCIAL WIZARD101 GROUP WOULD YOU LIKE TO JOIN? theyre listed below and all HOSTED by me and Luke! PyroMasters - pyromancy (sorry only 8+ on any group) Frozen on the spot - thaumaturgy Humble healers - theurgy Deadly and Dreadful - necromancy Summon and Conjure - conjury Wizards of the Wise - the 16+ wizards organization! Order of the Fang - the 21+ wizards organization! ReInter - all the other schools (astral) PS. sorry for short post and I'm 13 Luke is 13 but we're wizards of the wise and order of the fang this is only exception!
We have got a letter from Heather Ravensinger -
Plz can u make the guide to combat book more detailed and long>? thx
so that is why we made it!
chapter one is the back to the beginning post!!!
What are Item Stats: When you first arrive in Wizard City, you are arrayed in the Ravenwood School Robes...which offer no enhancements at all...zip, zero, zilch. On top of offering no enhancements, while you can dye them to colors of your choosing, they are still a school uniform...and who wants to wear a school uniform!?
So you set out on your first quests and discover that as you best those ghouls, pirates and fairies on Unicorn Way, they drop treasure! Not just gold, but new equipment. All right! Now I can run around in Dorothy's Ruby Slippers (suddenly have songs about rainbows and and brains floating in my head). As you examine these new finds, you also notice that they offer enhancements to your abilities...you have officially started down the path of Item Stats.
There are enhancements for Accuracy, Health, Mana, Damage Boost, Damage Resist, Incoming Health, Outgoing Health and Increased Chance of Power Pips. Which of these your wizard seeks out as you progress through the Spiral is a decision that you have to make. However, some of these are best suited for certain schools to acquire. For example, a Storm wizard would most likely be looking for Accuracy and Health, as those are the weakest points for that school, where an Ice wizard would be looking to increase their Damage Boost (because our spells are wimps!).
ironhawk, on Wizard101 Central, has made some excellent guides to the various bosses in the spiral, and what items they drop. I have found this an excellent reference not only while working my way through the worlds, but also when farming for better items. I have linked a couple of them here for reference:Grizzleheim, Marleybone, Mooshu, Dragonspyre
Style vs Stats:
I will be the first to admit some of the best enhancements you can find on gear will make your wizard about as attractive as the cat below.
While it may be against our desires to want to make ourselves look like that, it can be beneficial at times. So if you are one who tends to ensure highest style at all times, it might be a good idea to keep a set of some ugly clothing around for the harder battles. Who knows, maybe if you slip those bits of nastiness on, some of those bosses might just run at the sight of you!
A Quick Look at Each Enhancement: Lets review each enhancement and what it does for you so that we can all make the best decisions for our wizards. As stated earlier, the enhancements available are: Accuracy, Health, Mana, Damage Boost, Damage Resist, Incoming Health, Outgoing Health and Increased Chance of Power Pips.
Accuracy: Items that increase your accuracy help you reduce the frequency of fizzling. If you have a storm card that has an accuracy of 75%, and you are wearing items that give you 6% accuracy increase for storm, then when that card is used, the effective accuracy is 81%. You might be surprised how much even that little bit can help.
Health: Items that increase your health make those oh so important numbers in your health globes go up by that amount. A few extra points of health can be a life saver at times. I don't know how many battles I have fought and ended with under 10 health left. If I hadn't been wearing one of my clothing items at the time that gave this boost, I would have found myself standing in the Commons mumbling a few choice words.
Mana: Items that increase your mana allow you to go longer between potion uses, and fill ups. In the higher levels of the games these are nice and help limit the amount of times you have to return and play games or chase whisps. These however are useless in PvP and mana is not used in the arena. So if you do a lot of PvP, you might want alternative items to wear while dueling, unless you are getting other stat boosts with the mana.
Damage Boost: The Damage Boost increases the hit value on your attack cards by the amount specified. For schools with weaker attacks, these can be of great benefit.
Damage Resist: The Damage Resist, will reduce the strength of attacks against you by the amount specified. For schools with lower health, these can be a much needed addition.
Incoming Health: The increases to incoming health will give a boost by the amount specified every time you heal yourself, or someone else heals you.
Outgoing Health: The increases to outgoing health will give a boost by the amount specified every time you use a healing card on yourself or others.
Increased Chance of Power Pips: These increases can boost your power pip chance. With these changes, especially the higher in level you get, the use of these may see you shift to using your primary school heavily, and may even see you completely remove your secondary school attacks from your deck.
Well, that about covers those. As a further note, you will find some items that have plus(+) increases rather than percentage(%) increases. When in the lower levels of the game, the plus items may give you a better increase than percentage. You will just need to evaluate what the effect will be on the cards you are using at that time, and make your equipment adjustments accordingly.
As always, I hope this was informative for the newer users, and a nice refresher for some of the old dogs around here. If you have any questions, do not hesitate to ask.
The Mechanics of Bubbles: Quite often I hear fellow wizards asking what those big bubbles are that surround a battle. The bubbles are a set of global spells, meaning they have an effect on every player in the battle, this include the computer characters that you are battling. Each school has their own bubble, and there are two basic groupings: Damage Boosters and Special Effects. We'll look at both groups separately, and each individual bubble within those groups. As an interesting side note, you may also hear these referred to as Ring Spells, Aura Spells, Dome Spells, or a variety of other names...we like the lighthearted fell of Bubble Spells, so we'll stick with that.
The Global Aspects: A key thing to bear in mind about the bubbles is that they effect everyone. If you are a Fire wizard and are facing down a Fire mob, it is probably best that you not use the bubble. Because with the bubble in place, you will increase all of the Fire damage you suffer as well. Always assess the opposition to determine if you are going to give them as much or more of an advantage than you will gain by using the bubble before casting it. There are times that it is best relegated to the ash heap of the discard pile.
Damage Boosters: All of the bubbles from the elemental schools (Storm, Fire and Ice) fall into this category as well as the Myth school. When these global spells are in effect that schools attacks get an increase in damage, regardless of who uses them. Here are the critical stats on each of these schools bubbles:
Storm: Darkwind The Darkwind card costs 2 pips to cast and adds an extra 25% to all Storm attacks. This bubble is easily identifiable by the dark storm clouds overhead, and the rain that drenches you and leaves you feeling like you just stepped out of a monsoon.
Fire: Wyldfire The Wyldfire card costs 2 pips to cast and adds and extra 25% to all Fire attacks. This bubble is easily confused by newcomers with the Balance bubble. Tips to help identify this bubble would include: look closely at the bottom of the bubble and make sure that you see flames, and watch for the ash that try to fall and cover everything that is being incinerated.
Ice: Balefrost The Balefrost card costs 2 pips to cast and adds an extra 35% to all Ice attacks. This bubble is readily identifiable by the sudden drop in temperature, and the snowflakes that start to lightly fall. Watch letting this bubble be in place to long, or you might find Scarecrows trying to make snow angles in the center of the dueling ring. That is quite a disturbing thing to see.
Myth: Time of Legend The Time of Legend card costs 2 pips to cast and adds and extra 25% to all Myth attacks. This bubble is easy to identify because of the eyes that swirl all around you. It can have a tendency to start giving you that feeling of being watched, so unless you are Myth, I would suggest replacing this with one of your own before you find out that it is Orthrus that has been watching you.
There you have it, what each of the Damage Boost Bubbles do, and how to identify them. Now lets take a look at the Special Effects class of bubbles.
Special Effects: The remaining schools (Life, Death and Balance) fall into this category. How Myth wound up with the elemental schools is a puzzle to me even now, but that is a topic for a different time. Each of the bubbles for these schools has a unique impact on the playing field. Lets look at these individually as well and see what they can do for us...or against us as the case may be. Here are the critical stats for each of the remaining bubbles:
Life: Sanctuary The Sanctuary card costs 3 pips to cast and increases all healing spells by 50%. This bubble is easily identifiable with is Life like coloring (green) and the relaxing, gentle drift of leaves as the float to the arena floor. Be careful with this one, because all of those leaves lying about becomes a high fire risk should someone follow it up with Wyldfire.
Death: Doom and Gloom The Doom and Gloom card costs 3 pips to cast and decreases all healing spells by 50%. This bubble is readily identifiable by the since of despair you will feel as your pixie suddenly generates only 200 health. Then you become even more glum as you watch those sap health spells from the Necromancers still operate at full power.
Balance: Power Play The Power Play card costs 4 pips to cast and increases every players power pip chance by 35%. As noted earlier, this bubble is easily confused with Wyldfire, if you don't notice the flames or the ash watch your power pips show up more often. A word of warning on this bubble. While it might excite you to be getting more power pips, remember that those same pips are now accumulating to empower Lady Judgment, might be wise to let those pips build at a normal rate.
There are the details on the Special Effect Bubbles, what they do and how to identify them.
Once you have seen these in use a few times, you will begin to get a firm handle on when you can put another players bubble to work for you, and when you should plan to remove it posthaste. Just remember that you may be helping out your opposition when you use it though.
I hope this helps you understand the bubbles and their global effect on the cards and players.
The Mechanics of how Traps, Shields, Prisms and Absorbs Get Applied: For those of you familiar with inventory control systems, the usage of traps, shields, etc, would be likened to a FILO (First In Last Out) system. When you cast a spell, the traps that have been placed around your target will be used in the reverseorder from the the way they were applied, so we'll call this the FOLO (First On Last Off) system.
If you place a set of Elemental Traps (One each of Ice, Fire and Storm) on your opponent, then your opponent places a Storm shield up. When you use your next Storm spell, the results would appear like this:
The Storm Shield would be consumed.
The Storm Trap from the Elemental Traps would be consumed.
Notice how the last item placed was the first item off. That scenario would still result in some damage making it through to the target. Let's change the scenario now, to include an Absorb.
If you placed a Fire Trap on your target, and then they dropped an Absorb (Life or Ice), then you hit them with a Firecat, the result would be as follows:
The Firecat would hit the Absorb, and the damage would be reduced to 0...that's right, a big goose egg.
The Fire Trap would still be consumed.
You did not misread that. Even though there was no damage remaining, and the Absorb is still in place, all Traps that should be triggered will be, even if they have no damage to increase and are behind the Absorb.
Now, I know that Prisms are one of the items that trip people up the most. The trick with Prisms it to keep in mind the FOLO (First On Last Off), and remember that when the Prism gets triggered, all of the damage from that point on registers as the opposite school.
So apply your traps from the opposite school first. We'll say we have just applied a set of Spirit Traps (One each from Death, Myth and Life). One of our team mates then applies a Myth Trap. We then put our Storm Prism on, which will convert Storm damage to Myth damage. Then we apply a Windstorm. Once we use our attack, Kraken, the result would be:
The Windstorm would trigger.
The Storm Prism would trigger (and everything will be Myth from here on)
The Myth Trap would trigger.
The Myth Trap from the Spirit Trap set would trigger.
And there you have it, the way to use your Prisms.
The Mechanics of how Traps, Shields, Prisms and Absorbs Effect a Spell: There is a big difference in how traps react and effect our damage, compared to how our blades operated. Our blades would effect all damage from a spell, but a trap will only modify one pulse of damage.
If we return to the Fire Elf example, if you have placed 2 Fire Traps on your opponent, and then use a Fire Elf, the damage would be effected like this:
The first Fire Trap would get consumed with the initial damage hit.
The second Fire Trap would get consumed with the first damage pulse.
The second and third damage pulses would each produce normal damage.
This difference is important to note, especially for our Myth friends. They have a few attacks that do a double hit. If they have only applied a single Myth Trap prior to using Minotaur, then the smaller hit will use the trap up, and the larger hit will not receive any boost. This is one of the reasons that I would suggest that Myth persons not worry about Feint. To really be effective with their best hits, they have to get two of them in place, and that allows time for multiple Myth Shields to be dropped as well by the opponent.
The next item to note is how Absorbs effect spells. For the most part, they do exactly what they say they will do. A 400 point absorb, will reduce the spell, or spells until it has buffered 400 points of damage from you. If the first spell that its it only does 250 points of damage, then the Absorb will stay in place until it has reduced another 150 points of damage. These can be quite nice.
However, both the Life and Ice absorbs have a weakness. Sap Health spells. That's right, our friends the Necromancers can slip right through these special shields and drain our life away to heal themselves. The Absorbs will have absolutely NO EFFECT on...Ghoul, Vampire, Wraith or Scarecrow. So if you see one of those coming, you had better hope that you have a Tower Shield, or some form of Death Shield up, or it is going to hurt.
The Mechanics of how to Maximize Your Traps: Stacking multiple Traps of the same type will only trigger one of them at a time. For example, if you put up two Myth Traps, when you throw your spell, only one of them will get triggered. The trick to increasing your Trap damage, is to stack traps, for the same damage school, of different types.
For example if you have trained the Spirit Traps from Niles, and you have purchased a set of Spirit Traps from the Library, then you can stack those together, and BOTH Myth Traps will get triggered when you attack. Even though they are both Spirit Traps, they are considered in game to be of different types.
You may also be able to pick up an extra trap from an amulet (Thank you Alex) for example that will stack in with your normal school traps for increased damage.
Another special note would be those special traps, Hex, Curse and Feint, which will stack with any other schools traps for increased damage.
So, you could have an amulet that give you a special Myth Trap, shoes that give you Hex or Curse, could have trained Feint and could generate a stack of traps like this:
And ALL of the Myth Traps would trigger on attack, as well as the Hex and Feint, giving you 6 boosts from your Trap set. And to increase that more you could have started with a few Storm Traps, and set your Myth Prism on there before you Myth Traps to add a couple more boosts in there as well.
A Note on Calculating Damage: For the vast majority of items in game, rounding is not used. Everything truncates to the lower number. There are some occasional exceptions, but I have not been able to pinpoint what causes those to manifest themselves. So as a general rule, always round down.
I hope that this helps you gain a firm grip on how Traps, Shields, Prisms and Absorbs can effect your spells.
This marks the beginning of a series we will be running on the basics of the Wizard101 mechanics, and how those can impact your game play. The Mechanics of how Blades and Charms Get Applied: For those of you familiar with inventory control systems, the usage of blades and charms would be likened to a FIFO (First In First Out) system. When you cast a spell, the blades over your head will be used in the order they were applied, so we'll call this the FOFO (First On First Off) system.
If you put a set of Elemental Blades (One each of Ice, Storm and Fire) over your head, and then your opponent places a Weakness on you, then you used a Fire Elf, the result would be:
Elemental Fire Blade would be used.
Weakness would be used.
If the order were reversed, and the Weakness was applied to you first, before you put the Elemental Blades on, the the result when using the Fire Elf would be:
Weakness would be used.
Elemental Fire Blade would be used.
The same principal holds true regardless of the number of blades and charms that have been applied. Just remember FOFO! ;)
The Mechanics of how Blades and Charms Effect a Spell: For most cases this area seems obvious. If you have an Ice Blade up, and use a Colossus, then the damage is increased by 40%. That means that with a Colossus doing 460-540 base damage, the Ice Blade alone will place the damage into the 644-756 range.
What is often missed though, is that blades and charms have an effect over the entire life of a spell. What this means is that when you use a DOT (Damage Over Time) spell, the initial hit, if it has one, and all remaining pulses are affected by the blades and charms.
Using Poison as an example. Poison has a damage of 35 + 390 Death damage over 3 rounds. This means it will have an initial hit of 35 points, and then do 130 points of damage each round for 3 rounds, for a total of 425 points of damage.
If you have applied a Death Blade and a set of Spirit Blades (One each of Death, Myth and Life), then use Poison, the result would be:
Spirit Death Blade would be applied (+35%)
Death Blade would be applied (+40%)
Initial hit damage would be increased from 35 to 65
Each pulse of damage for the next 3 rounds would increase from 130 to 245
Bringing the total damage of the spell from 425 points to 800 points!
A Note on Calculating Damage: For the vast majority of items in game, rounding is not used. Everything truncates to the lower number. There are some occasional exceptions, but I have not been able to pinpoint what causes those to manifest themselves. So as a general rule, always round down.
I hope that this helps you gain a firm grip on how Blade and Charms can effect your spells,
ALSO SEE OUR NEXT POST
cya , LUKE THE LIFE and his brother Freddy the Fire
Filling Your Deck: Thats right, what you have in your deck can make all the difference as to whether or not you are going to emerge successful from your encounters in the spiral. We are going to be looking at deck setup for the PvE portion of the game, asAlex has a blog on PvP deck setups already, and he is far more qualified than me for that! So, lets start with that age old question....
What's in YOUR deck?
If you are stuffing every card you can into your deck, and filling the sideboard, chances are you are spending much more time discarding and passing for battles than you are in actually being productive.
Back to the Beginning: As a new wizard with your starter deck, you find yourself in battle on Unicorn way. The dark sprite looked so cute, and you just wanted to say hi, but then...BAM! She has you in the dueling circle and you are in a fight for your life...she was not so nice after all!
Why do I bring this up? Because there is a lesson to be learned from these early battles. As long as you have your most effective spells loaded, you can make it though most encounters in the spiral with very few cards. Yes, you have the starter deck filled to the point that you have to use straps to close it and keep the top on...but even when you are running some of the larger decks later, you should try to limit the cards you carry to as few as possible.
All of my wizards pack around 20 cards at all times. This proves efficient for taking out the enemy without a lot of discards. It also assists in making sure you have what you need, when you need it...no digging and looking for that card that could be 40 cards deep in the deck.
I know there are some that will run with a deck with as few as 8 cards in it...personally, I don't like to run that thin. I chose my setup so that if someone joins me, I can assist on the final enemy or two before having to reshuffle, but also, just so I have some extra traps around so that I can take a more friendly approach to my traps. It isn't as vital if someone uses a wand to break one, because I have an extra or two in hand.
Sidebar: The Friendly Necromancer recently answered a question for a reader about the issues that can arise between friends when decks are too thin, and I would suggest you take the time to view it if you have not already.
So What Should I Carry: Ok, I will give you the breakdown of what my wizards pack around as a general rule. You will have to play with your deck to find what matches your play style a little better. Note: all of these suggestion assume that you have attained a certain level and trained specific spells, if you haven't you will have to make your own decisions about what should be involved.
3 School Blades
3 School traps
2 School Spells (your next to best)
2 School Spells (your best - NOTE, this doesn't necessarily mean the 7 pip spells, as they may not be the most effective for your school)
1 Pixie - for self heal (my necromancer uses Sacrifice instead of pixie)
4 shields (depends on what school you are and what you are fighting, some of my wizards don't carry any shields)
2 Reshuffle (discard the first, and then you are set up for an endless deck)
2 Misc buffs (feints, balance traps/blades, etc)
That covers the basic 20 cards I have in my deck. I of course still have my item cards, and a couple of heal anyone cards in my sideboard as a just in case. With this setup, I am able to solo most battles in the Spiral, and have only had to use the reshuffle a handful of times. When I am going up against opponents from my school, I add in MAX prisms. I do wind up discarding some of them, but I want to ensure they come up quickly, so I can get the prism on before they drop the shield to block the converted damage.
I feel it should be said again that it is important that YOU feel comfortable with what's in your deck. If you find yourself worried about your cards, then add a few more until you feel comfortable...you want to keep the game fun, and not a source of stress. :)
If you are not used to running a smaller deck and want to try it, I would also suggest going back to a world you have already finished up and trying it there, where you should have a large advantage in the fight just by being you.
Now, all of you others out there that have views on smaller decks, let's hear them. :)
Oh and remember you should have ONE wizard who doesnt follow these rules :)
Hello,It'zzzzzza Luke here and today's subjects is MINIONS and POEMS! Halloween in wizard101- We gathered by Blossom and looked down the way. Who would go Trick or Treat Cyrus? 'No Way!' He's scary enough the rest of the year, But on All Hallows' Eve, my knees quake in fear.
Soon the infamous dare did appear. Now I'm on my broom stick hardly able to steer. The Myth Tower looms, Cyrus glares down at me. But no harsh words, just some Truffula Tea? I have often faced life wizards that have never pulled out the Sprite Guardian during PvP...WHY?!
I borrowed my friend's character for a day (he let me) and I tried him out. He was a lv20 life.
Had one duel today, where I was facing a Balance wizard that was level 24. He was going first, had 4 pips and I was down to around 230 health. I queued up a Pixie...and my new little friend queued up a pixie as well. At the time, I had about 6 pips up.
My opponent went, I died, he said Good Game...then bless her dainty little pixels, she brought me back from the other side, I followed up with a Pixie of my own, and suddenly it was a whole new match!
I LOVE THAT MINION!
Sorry Cyclops...you have fallen into second place in my list of favorite minions.
Guess I'll have to get busy with a Balance character so I can test out the Mander and see where it falls! sry for the short post :) cya!
Hey itzz a Luke 'ere! Every sometime we will be writing short books for wizzy's players!
This time it's Skilled Magical Combat,explaining the basics and advanced techniques of magical battles!
--------------------------------------------------------------------------------------------
Ok,so you know the high pip spells? Yes? Well,if you save up pips by casting some 0 pip spells you might up to +85% than the original damage and maybe a few shields! So lets choose a firecat for example ranging
from 85-135 (95-135 sometimes) with some minor 0 pip spells it could be ranging from 386 to 562!
All you need is A FIRECAT,a hex,a fireblade and firetrap and a balanceblade!!!
You see the school icon next or under a monster's name? This shows what they're resistant to! For example a helephant on a Fire monster would do about 25% less damage than normal!
They're all resistant but they all also have a boost! These are spells that have an extra effect.
My chart is below -
(it is incomplete)
Death spell : boost on either LIFE mob/boss or BALANCE mob/boss I'm not sure...
Life spell : boost on DEATH mob/boss...
Balance spell : (unknown try to find out yourself)
Myth spell : boost on either BALANCE mob/boss or LIFE mob/boss
Fire spell : Boost on ICE mob/boss...
Ice Spell : boost on FIRE mob/boss...
Storm spell : boost on (unknown try to find out yourself)
HEALING in the game is very important so I suggest choosing death or life as a secondary school. The PIXIE spell,given at lv3 doing a 400 heal to yourself only,is received as FAIRY doing 420 to anyone. The satyr spell is always useful but in my opinion the best healing spell is either DRYAD or the one where God's Hand reaches out of clouds...
Hi! It's Luke again! This post is all about other great games I love except from wizzy! Pirate101 of course. I love it coz... It's Pirate101! The Cossacks series.I love them coz...It's very addicting+takes skill and planning ahead to win! The Age of Empires series.I love them coz... look at the Cossacks description. The FATE series.There are over 12930388301938 monsters, 1293819739264392789437489713947100036482364836 clothing, 3838180980928321739193000017731643 weapons and 193129381240 bosses as well as 399999 characters and merchants!!!!!!!!!!!!!!! The Bloons series. I just luv it! Monkeys VS balloons LOL xD Anything Mortal Kombat related. MORTAL KOMBAT!!! subzeroooo sonyaaaa raidennnn johnnyyy cageeee! 18+ only im 13 HAHAHAHA! Anything Harry Potter related. With over 185 and still coming spells this makes it look like wizzy is a HP mmo :) One more is ANY ARCADE GAME! - theyre RETRO,CLASSIC,COOL AND SIMPLE! That's all I need really! PLUS type in "wonzoo183" in the comments and your name and username to wizzy and you might receive one of these games! After the winner has received I will delete all the comments. cya
Azteca is home to the Aztecosaurs; the
oldest race in the Spiral. Long believed to have been lost, this world now lives
in peril of being destroyed...
Players who are a minimum of level 80 and
who have completed the Avalon quest "A Great Storm Coming" must speak to
Cyrus Drake in Ravenwood (not Merle like you usually do). He will send you
along to Marleybone for a very unique experience. Completing Cyrus' quest will
give you the Spiral Key to Azteca.
Halley's Tower is
a zone you must complete alone.Access Pass Prices For our Crowns
players, Azteca is broken up into 6 different zones. These zones will cost 1995
Crowns each for a total of 11970 Crowns to purchase the entire world of Azteca.
Level 90
Wizards can now achieve Level 90!
With the addition of Azteca, Wizards can now
reach the maximum level of 90 and achieve a new title badge!
This
means all new gear and equipment for Wizards over level 80, and it also means
new challenges that will test even the most experienced player.
Please
remember, when you were at the previous level maximum of 80 no experience was
rewarded for duels and quests completed when you were level 80. When a player
reaches the maximum level, their experience bar disappears, indicating they are
not gaining experience from their duels or quests. No experience is rewarded to
those who are at the maximum level, which means that everyone who was level 80
before we raised the level cap, will be level 80 to start, now that we have
raised the level cap, and you can once again start earning new experience points
from your adventures.
Experience was not earned when you were level 80
and therefore cannot be granted after the level cap is raised.
Training Points will be awarded at level
85 and 90 as usual, plus there will be bonus Training Points available through
quests in Azteca.
New Rank 10 School Damage Spells
New Rank 10 Damage Spells
New Rank 10 Damage spells for all schools! These
powerful damage spells must be earned through a challenging quest specific to
your main school of focus.
If you are a minimum of level 88 and have
obtained your level 68 spell quest speak to your Professor to receive a quest
for your level 88 spell. Life School: To qualify for
the quest "Spiny Happy People" Life Wizards must have completed "The Green Mile"
quest and be Level 88 or higher.
Balance School: To qualify for
the quest "Hold That Tiger" Balance Wizards must have completed "It!" quest and
be Level 88 or higher.
Death School: To qualify for the quest
"Avenging Assembly" Death Wizards must have completed "Bag of Bones" quest and
be Level 88 or higher.
Myth School: To qualify for the quest "Mark
your Calendar" Myth Wizards must have completed "Eyes of the Dragon" quest and
be Level 88 or higher.
Storm School: To qualify for the quest
"Storm Warning" Storm Wizards must have completed "Hearts in Atlantis" quest and
be Level 88 or higher.
Ice School: To qualify for the quest
"Winter is Coming" Ice Wizards must have completed "Misery" quest and be Level
88 or higher.
Fire School: To qualify for the quest
"Sunny Fundays" Fire Wizards must have completed "Firestarter" quest and be
Level 88 or higher.
New Astral Spells
New Astral Spells
After you have completed the
"Midnight Sun" quest in Zafaria, talk to Pacal Redmask in Azteca. He will start
you on the quest "King of Fang and Claw" to find Tezcat Threestar in Cenote and
return him to Zocalo. Tezcat will then offer you quests for the Astral spells
and you must return to him to advance to the next quest.
Star School
Must be minimum level 84
Must have completed the quest
"Midnight Sun" in Zafaria
Must have completed the quest
"King of Fang and Claw" in Azteca
Sun School
Wards, charms and heals can now be enchanted with new Sun
Spells!
Must be minimum level 86
Must have completed the quest
"Thorn in My Pride" in Zafaria
Must have completed the quest
"Third Star on the Left" in Azteca
Moon School
Must be minimum level 88
Must have completed "Turn Up
the Sun" in Azteca
Must have completed "In My
Eyes" in Azteca
New Combat Tutorials
New Combat Tutorials!
Diego has new combat tutorials for players who are
level 20 and higher and level 50 and higher!
Diego's level 20 tutorial
called "Hard to Resist" will teach players about Resistance to spells, How to
use Prisms, Global spells and Stun Shields.
Diego's level 50 tutorial
replaces the old "Fighter's Block" tutorial with a new enhanced "Arrow to the
Knee" tutorial which will teach players about Critical
and Block, Armor Piercing and Astral Spells.
Visit Diego in Unicorn Way
today!
Crafting, Gardening and Housing Updates
These are updates to Crafting,
Gardening & Housing
Crafting
New Crafting Levels! Avid Crafters can now reach the next level of
Crafting to become a Transcendent Crafter. If you have completed the quest "Drum
a Little Drum" in Zafaria, speak to Oztomecca the Weaver to be given the quest
"Making the Grade" which will challenge you like never before.
Other
Crafting Updates
Interacting with a Crafting
Station will only display the recipes that can be crafted at that station
Recipes now sort
alphabetically.
Gardening
Small soil can now be
arranged like small pots
Players can now see, but not
use, Gardening Treasure cards before they are level 12 and/or have completed the
Gardening introduction quest
Gardening Experience Totals
will now display correctly
The correct Likes &
Dislikes of many plants now display properly on the seed description
Housing
Objects can now be placed
inside the Shark Hut
The label on the Crate of
Vegetables is now spelled correctly. Gobblers can't spell very well.
Lights on the Yuletide tree
housing decoration will now twinkle (just in time to be thinking about
Yuletide...)
Shopping & Inventory Updates
These are updates and changes
to Shopping & Inventory Gold
Wizards under level 80 can
have a maximum of 300 000 Gold and Wizards over level 80 can have a maximum of
350 000 Gold to accommodate the higher value items available at that level
Players should now see the
correct gold amount when selling directly from their bank Treasure
Cards
Players who have the maximum
number of Treasure Cards will receive the message 'Treasure Cards Full' when
attempting to purchase cards from the Bazaar.
Players can now see the total
number of Treasure Cards they have in their inventory on the Treasure Card page
of their spellbook
"Buy More" and "Sell More"
features added to the Bazaar Treasure Card section that will allow you to buy
and sell Treasure Cards in bulk
"Buy More" features added to
the Treasure Card shops that will allow you to buy Treasure Cards in bulk
New Ways to buy High Level Gear
New high level gear in the
Crown Shop is available in two different ways:
By individual item - purchase
just the hat, just the robe or just the boots individually.
By set - purchase the set as
a single item and get a discount!* *purchasing the set means purchasing the
one item that offers all three pieces at once. It does not mean buying the hat,
then the boots, then the robe in any order.
Other
Prices have been adjusted for
many older weapons and outfits
The Trophies tab in the
Bazaar, and Housing and Furniture windows, is now a "Music Scrolls" tab
Players should no longer
encounter an error message when selling a deck from their bank
Crown Shop sorting arrows now
displaying properly
If you try to purchase a
Henchman when there are no empty available spots in the duel, you will receive
the message "Your duel circle is full, you cannot purchase a Henchman."
Miscellaneous Updates
These are Miscellaneous
Updates and Fixes
Menu Chat Updates
The duplicate "I like your
pet!" has been removed from Menu Chat
The phrases "Let's Meet in
Avalon!" and "Let's go to Avalon" as well as similar phrases for Azteca, have
been added to Menu Chat Text Chat Updates
The @ symbol can no longer be
used to replace the letter a in typed text chat Quest Updates
Players should no longer get
stuck on the wall of ice in Sudriland! Yay!
Players should no longer get
trapped in an empty combat sigil after dueling Rasik Pridefall in Zafaria's
Black Palace Combat Updates
Legion Shield should now
cloak for the entire friendly team, not just the caster
Bad Juju spell can now be
cloaked
Dark Pact spell can now be
cloaked
Players disconnected during a
PvP match will not receive rewards at the end of the match
Some of the creatures in
Azteca have Mastery Amulets Area Updates
Lighting in the Celestia PvP
Arena has been toned down a bit
Health wisps have been added
to Elephant's Graveyard in Zafaria Creature Updates
Some creatures in Celestia
will have more sounds when they're hit or are defeated
Creatures of the Spiral that
had a little 'hiccup' in their step should walk much more smoothly. If you see a
creature who is still a-shufflin' let us know by using the Bug Report button in
the Test Realm
PEOPLE RECORD 4 - fourth update
RAMI PRIVATE FARNSWORTH (ROYAL EXPEDITIONARY FORCE) MS CONRAIL FELICIA WORTHINGTON (INITIATE CRAFTER) CAMPELL HODGSON (REAGENT VENDOR) HENRY WELLINGBROOK QUENTIN BODDINGTON GORDON SUMMER (SNACK VENDOR) ABIGAIL DOOLITTLE CHARLOTTE WILKINSON (RECIPE VENDOR) PRIVATE KINCHLEY DESMOND FANSHAWE (SNACK RECIPE VENDOR) SHERLOCK BONES MAYOR PIMSBURY RUPERT SALISBURY (RECIPE VENDOR) OFFICER BARKLY TRACY CASTLETON (TICKETMASTER) THE PROFESSOR OFFICER MCRUFF MARCEL MEYOW WADE WADSWORTH (PRISONER) WATSON DARCY HOLDSTOCK (RECIPE VENDOR) SERGEANT STEEG LINDA MILLTOP RUFUS CAVENDISH (RECIPE VENDOR) MARID AU'DRAN (RECIPE VENDOR) GENERAL KHABA SHALEK THE WISE HARSAN BAR'KHOUR (RECIPE VENDOR) GEOFFREY SPELLSMITH (ATHAME SHOPKEEPER) VELMA PEPPER (PROFESSOR) ZAFER FLAMEWIELDER (SNACK VENDOR)
Hizzz its Luke this is the 3rd update
HIGIN FATESEER EINAR THUNDERHAMMER SWIFTBRANCH AEVAR THE SWIFT RETHEL THE FIERCE RONETH THE UNLUCKY SOREN THE WISE WILDROOT HAAREK SILVERSCALE (FISH MASTER) SNORRI OYSTERBLOOM GRUMLIK IMRIC GLOOMLIGHT (CRYPTKEEPER) HAGEN SHIELDBREAKER
LIEUTENANT STANDISH
Thanks for looking at my blog C YA next time
Hey Guys!! It's Luke! I just got into the Karanahn Barracks and the Spirit well and Grizzleheim by accident so I thought I'll update the people list from last time with some more! (sorry if some repeat or have been in the 1st already) -------------------------------------------------------------------------------
MAH'REK SAMIIR NAIDU(RECIPE VENDOR) KROKHOTEP (?!) KAJI'RAE (KROKOTOPIA WARRIOR) HOD MINDSEEKER UNFERTH WOODWISE GARM MOONSTALKER EITHUN LONGSTRIDER ULTHIR THE WISE SKEGGIS FORKBEAK GROND URD SKULD VERDANDI GRANDMOTHER RAVEN grizzleheim!!! _________________________ KOJAN GREYHAMMER (BLACKSMITH) DROGAN CLAYFINGERS (POTTER) BALDUR GOLDPAWS FINNULF SHARPTOOTH ESKIL RUNEWAND (ATHAME AND WAND SHOPKEEPER) ERIK WYRDRUNE VIDAR SILVERTHREAD (ROBE SHOPKEEPER) TORALD WAYFINDER (RECIPE VENDOR) DAIN GOLDWRIGHT (JEWELRY SHOPKEEPER) THRAIN STORMFRIEND (HAT AND SHOE SHOPKEEPER) THORLIEF WOODCRAFTER (FURNITURE SHOPKEEPER) BJORN IRONCLAWS
we have had a submission from Ronan GhostPetal!
He survived all of Zeke's "finding" quests!!!! This is where to find them
The Smiths - Unicorn Way-As you step out of the Hedge Maze and back into Unicorn way look to your right in the corner just before the street begins. Mini fairgrounds-He is behind at tree just to the left of the blue tent with the big sun and moon on it. Golem court- When you enter Golem Court go to the right side of Golem Tower and he is behind a tree. Ravenwood- Go behind the School of Myth and he is standing near the bench in the corner. Shopping district-As soon as you enter the Shopping District make a right turn at the first street, you will see two buildings with blue awnings. Go between the two buildings and the smith is standing next to the tree in the back. Triton Avenue- Make your way back until you cross the bridge over the waterfalls. As soon as you cross go to your left and he is standing under the cliff in the corner. FireCat Alley- (subscription only area) Make your way to Fireglobe theater. The Smith is standing outside just to the right if you are looking at the theater. Cyclops Lane (subscription only area) Make your way until you are in Festival Park. You will see Nolan Stormgate standing on a platform. Go behind the platform and there is a tree near the wall. You will find the Smith standing there. Colossus Boulevard (subscription only area) This is the final place you will gain access to and the last Smith is here. Follow the map all the way back to Heldreth Perch and the smith is standing near a statue.
The Beetles -
First Oasis Beetle: Behind the Robe and Deck shops. Second Oasis Beetle: To the right of the Library. Chamber of Fire Beetle: From Assistant Danforth go up 3 ramps and then follow path forward and to the right under two wood posts and next to crates Emperor's Retreat Beetle: Go to the frozen lake and look on the middle platform Krokospinx Beetle: Take floating boat to Krokosphinx's Island.Take a left behind the Great Sphinx. You'll see the beetle sitting up on a platform.
Tomb of Storms Beetle:
After entering the portal to the Tomb of Storms island, look behind the stone head portal. Well of Spirits Beetle: Climb up the stairs near the Djeserit Family Tomb, then turn left and look behind the giant krok statue. Karanahn Barracks Beetle: Look by the door of the non-accessible building to the far right side of the non-battle area. Altar of Kings: Down the stairs past the chamber of fire, next to the blocked off entrance.
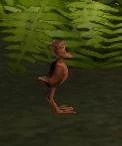
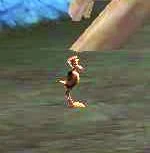
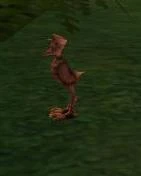
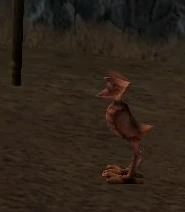
The Yardbirds -
Northguard - Go into fort in center of area. Go up to the fort entrance where Bjorn Ironclaws is standing. Go behind him and follow ramp all the way to the end. Yardbird is there.
Head around the ramp behind Bjorn Ironclaws Turn left on the ramp. The Yardbird is at the very end.
Yardbird: 2
Saverstaad Pass - When entering Webwood go to the split tree with spiders every where. Take a left and stay on right side. Take second right and locate hollow log. Yardbird there next to a fern.
In Webwood next to the hollow log with the webs inside. (The fern is on the path behind WebWood, between Swiftbranch and Wildroot. Look for a giant log overhead with a section missing and webs inside.)
Yardbird:3
Saverstaad Pass - When entering Boar Camp go to "Shattertusk's Hut" dungeon just beyond the last hut on the right Yardbird is behind the dungeon.
Behind Shattertusk's Hut in the Boars' Camp
Yardbird 4
Vigrid Roughland - As you enter area, turn right and go to teleport stornes. Follow along river to the right. Third tree is where Yardbird is at.
Behind a tree near the waterfall in the berry patch to the left of Egil Axebearer
Yardbird 5
Vigrid Roughland - Behind Hans there is a path. Follow it all the way to the end it is a long path and Yardbird at end next to three mushrooms.
Just past the second group of Informers and one of the lost bears Hans, up a winding path to the top of the hill. Follow the grassy path behind Hans.
Yardbird 6
Mirkholm Keep - As you enter cave system for first time locate Herkir. Look on map and locate Hyglak Shadowstalker (he is to the left of Herkir and down a bit). There is a small alcove between the two, Yardbird is there. Due West of Herkir's name and Due South of the elbow of the girl holding the wand.
In the lower right hand cave, east of the cavern where you fight Munin.
Yardbird 7
Mirkholm Keep - The caves where you fight muin, as you enter cave with teeth at entrance, you come to a room with Howlers take first right then next right Yardbird there.
In a very small alcove in the very middle of the cave system that Herkir is in. Look at your map. It is the small alcove exactly between Herkir and Hyglak Shadowstalker.
Yardbird: 8
Helgrind Warren - (Dungeon) This is the door on the left in the main hall, one of the three rooms in Nidavellir. After defeating the Golems, Yardbird is left of the entrance to the Storm room (bottom room on Helgrind map)
After defeating the Golems, the doors will open behind you. Look at the map below. The bottom (South) room contains the Yardbird. The bird is by the East wall of the room.
Yardbird 9
Ravenscar - Go to entrance of wood ramps. Take the ramp on the right. Stay to your right and go up to the Cave Golems. Stay right and take second Tunnel. Take a left and follow to end and the Yardbird is there. (Its on the way to Munis Mistweaver. Except, where you would turn right to go up the final ramp, there is a little alcove to the left. The bird is there.) The first Ravenscar Yardbird is at the tip of the location arrow on this map. It's in the upper right of the map, on the topmost layer of the caves, opposite the side that connects to the glacier.
The directions for this bird don't make a lot of sense to me, so hopefully this will help anyone else that finds them unclear..
Yardbird 10
Ravenscar - When you enter the Citadel Courtyard, before you enter the instance where The Coven is located, the Yardbird is just inside entrance on left. You cannot access this Yardbird until AFTER you have defeated the Gurtok Demon.


